Introduction to Wisenet Wave VMS and the AI Analytics Plugin
Wisenet WAVE is a scalable VIDEO MANAGEMENT solution built to handle modern security needs. First, it supports large camera counts while keeping the interface simple and fast. Second, it integrates with third-party systems and allows flexible deployment on-premise or in hybrid environments. For a concise overview, see this Wisenet WAVE product note on the vendor site Wisenet WAVE AI Plugin – Hanwha Vision. Also, VisionPlatform.ai provides an independent perspective on how the AI extension works with Wisenet WAVE Hanwha AI video analytics plugin on Wisenet Wave.
The analytics plugin extends analytics to cameras without onboard intelligence. In other words, you can add AI capabilities to legacy streams. This approach reduces hardware churn and saves budget. For example, the AI analytics plugin enables object classification, intrusion alerts, and event metadata even for standard IP cameras. The plugin registers meaningful metadata into WAVE and into other VMS systems, enabling downstream automation and search.
Benefits are clear. First, false positives drop, often dramatically, when AI filters out irrelevant motion. Hanwha highlights reductions in false alarms when combining Wisenet 9 hardware with smart analytics Andrew Ross Sorkin on CNBC. Second, security teams gain enhanced detection and classification. Third, operators get richer events for reporting and operational dashboards. For airports and critical sites, these enriched events can feed other subsystems like ANPR/LPR and crowd density tools; see our guidance on vehicle detection and ANPR integration for airports vehicle detection and classification. Finally, the analytics plugin for Wisenet WAVE makes it possible to scale AI across sites with minimal camera replacement, and it offers a smooth path to upgrade your entire video management estate.
Prerequisites and Camera Settings for AI Video Analytics
Before you install the AI plugin, check supported cameras and firmware. Wisenet cameras in the Wisenet P and 9 series are recommended for best performance, though the AI plugin can enable camera analytics on many ONVIF/RTSP streams. You should review the compatibility matrix and ensure your camera firmware is up to date. For technical setup notes and firmware guidance, consult the Hanwha Vision support portal Hanwha Vision support portal.
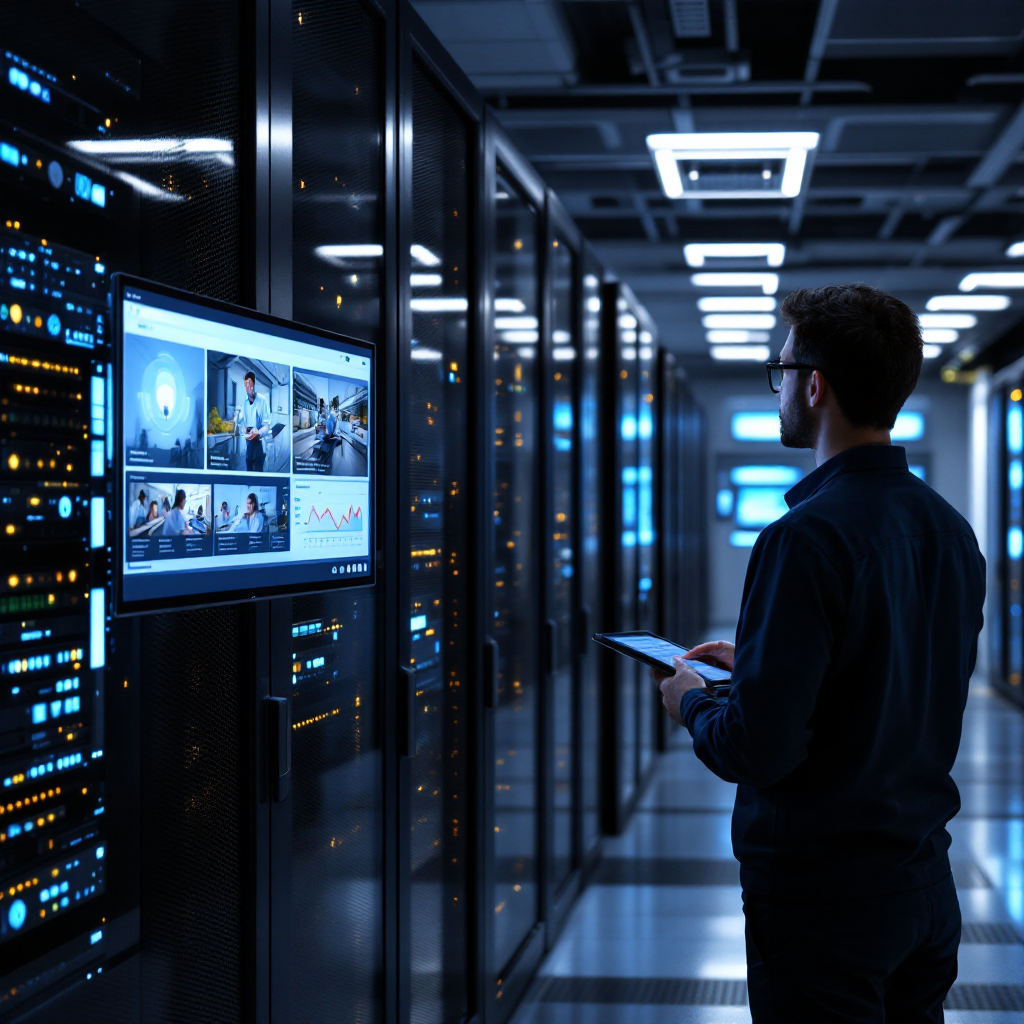
Network and system requirements matter. Run Wisenet Wave VMS on a server with sufficient CPU, storage, and network throughput. If you plan to host the AI workload centrally, allocate GPU resources or use a server-side acceleration card. Also, consider edge processing for bandwidth-limited sites. The Wisenet Wave server should have stable time and reliable storage for continuous video recording function and for analytics metadata. For best results, keep the VMS and plugin on machines that meet Hanwha’s published specifications Wisenet WAVE AI Plugin.
Recommended camera settings help you optimise detection precision in the area. Set exposure and shutter speed to reduce motion blur. Adjust resolution to balance detail and performance. Use a fixed field-of-view and avoid frequent digital zoom changes. Also, tune frame rate and compression to preserve image clarity without overloading the network. In the WAVE client you can then set excluded area settings and define an area for object detection to reduce background noise. When placing cameras, think about the area of interest and position to minimize occlusion. For advanced airport scenarios such as crowd detection and people counting, see our resources on crowd and people-counting analytics people counting in airports and thermal people detection thermal people detection in airports.

AI vision within minutes?
With our no-code platform you can just focus on your data, we’ll do the rest
Installing and Activating the Plugin in Wisenet WAVE
Start by downloading the plugin from the hanwha vision support portal. Then, prepare your Wisenet WAVE environment. For the download and installation package see the official PDF manual and user guide AI Plugin for Wisenet WAVE VMS (manual). First, ensure you have administrator access to the Wisenet Wave server. Next, stop the WAVE service before installing files. Then run the installer and follow the prompts. After installation, the next step is to activate the plugin and verify it registers with your WAVE instance.
To activate the plugin, use the WAVE administration menu and choose the AI plugin entry. You can activate a trial license for initial testing, or enter a purchased license key. The workflow supports activating the plugin and confirms success with a status icon in the client. If the plugin fails to register, check the server logs and network rules. Also, make sure the plugin can reach Hanwha’s licensing endpoint if using online activation. For step-by-step instructions to configure the AI plugin analytics consult Hanwha’s support article WAVE: How to configure the AI Plugin analytics.
Once you activate the plugin, add cameras into WAVE and assign analytics profiles. In some cases, you must install a companion package on the wisenet wave server to enable metadata routing. Then verify that the plugin streams metadata, that events appear in the timeline, and that the video recording function is unaffected. You can also enable multiple analytics per camera if you need combined rules such as people plus queue detection. If you use third-party VMS or SIEM integrations, confirm the plugin exposes events via webhooks or RTSP metadata.
Configuring AI Analytics and Video Analytics Rules
Open the Wisenet Wave client and go to the plugin settings to configure rules. The plugin settings page is where you enable object classes and tune sensitivity. You can create detection zones by drawing shapes on the live view. For example, draw a custom polygon to encompass the area where detection is needed. You may instead draw a polygon to encompass the area around a doorway, or you may custom polygon to encompass a parking bay. The goal is to define the polygon to encompass the area where relevant objects move. Then assign the polygon to a named rule like intrusion area 1 or area for object guarding.
Use the area for intrusion detection and area for object detection fields to control what triggers an alert. For example, create an area for object guarding near critical assets. Create excluded area settings to ignore sidewalks or tree lines. Also, set the event trigger logic so that an event is triggered only when a new target object is detected or when objects that move inside a region match your criteria. You can instruct the analytics to detect objects that stay or to detect objects left behind. For example, set rules that detect objects that stay in the defined area longer than a specified time and alert if a target object remains or is left in a specified area.
Advanced options include queue detection, where the plugin detects when the number of objects within a queue area exceeds a threshold. You can configure the system so it detects when the number of people in that defined area at any given time reaches a set value; this is handy for crowd management and for setting thresholds in high-traffic zones. Likewise, you can configure line crossing events—create a virtual line and the system detects if more than one object crosses it, or it detects objects that cross a defined line in a particular direction. There is even an option to create a multi-segment virtual line so you can create a multi-segment virtual line that matches complex exits. Finally, remember to tune sensitivity and thresholds to reduce false positives and enhance detection precision in the area.
AI vision within minutes?
With our no-code platform you can just focus on your data, we’ll do the rest
Leveraging Advanced AI Analytics in Wave VMS
The AI analytics plugin supports object classification for people, vehicles, animals and other classes. Use object detection to tag faces, vehicle types, and behaviours so operators can filter events quickly. The plugin attaches metadata to recordings so forensic search and playback become orders of magnitude faster. For an independent implementation example, see integration notes with third-party analytics and CVEDIA-RT documentation Wisenet WAVE – CVEDIA-RT.
Intrusion detection is configured with detection areas and timers. For instance, set the system to flag when a person enters an area and stays longer than a specified time. You can also set alerts for when objects move inside restricted zones or when a person is entering the area during closed hours. If the plugin detects a queue in front of a gate it can raise an event. If one object crosses a virtual line or if multiple objects cross a defined line within a predefined time interval, the system can trigger layered alarms. These precise triggers allow teams to respond to the exact moment when the event occurs and to capture the exact moment when the event began.
Metadata integration matters. The plugin can stream events into external systems, so you can operationalize vision data beyond security. For example, Visionplatform.ai connects detections to MQTT streams for dashboards and analytics while keeping models and data on-prem to support GDPR and the EU AI Act. If you want ANPR or LPR metadata for vehicle flows, pair Wisenet analytics with ANPR tools; see our ANPR implementation guide for airports ANPR/LPR in airports. This approach converts video into searchable events and supports rules like detects when the number and number of objects within a zone exceed capacity during a given time reaches a set threshold. As a result, you improve response time, reduce operator load, and deliver verified alarms instead of noisy alerts.

Maximising Security with AI Video Management and Analytics
Monitor live events and review AI-driven alerts in the WAVE client or via integrated dashboards. For operational teams, push event streams to dashboards, SCADA or BI systems. Visionplatform.ai recommends streaming structured events so security and operations both use the same camera-as-sensor data. This approach turns CCTV into actionable telemetry and helps you reuse video for safety, efficiency and compliance.
For playback, the AI metadata is searchable. You can jump to the exact clip where a new target object was first seen. The system detects objects that stay and tags the interval when the target object remains in frame. Then, during review, operators can filter for objects left behind or for movement patterns. The audio-free playback retains privacy while showing the exact moment when the event started and when the object crossed the area boundary.
Maintenance and updates keep performance optimal. Regularly update camera firmware and plugin modules, and test the impact the performance of the system under peak loads. Periodically review plugin settings and retrain or tune models if you notice an increase in false positives. Hanwha documents how to configure the ai plugin analytics and offers best practices in their support portal configure the AI plugin analytics. Also, consider a staged rollout: start with a sample of cameras, evaluate the detection precision in the area, then scale across sites. For perimeter and intrusion scenarios at airports, read more on intrusion detection and perimeter breach workflows intrusion detection in airports.
Finally, when tuning rules remember to use clear naming (for example, intrusion area 1 or area for object guarding) and to log changes. Keep an audit trail of plugin settings, and periodically enable a trial license when testing new functionality. By combining planned maintenance, careful camera settings, and robust rule sets you can reduce false positives and enhance detection precision, which makes the entire security operation more efficient and more auditable.
FAQ
What cameras support the AI plugin for Wisenet WAVE?
Support varies by model and firmware. Wisenet P and Wisenet 9 series are recommended for best results, but many ONVIF or RTSP cameras can use the analytics plugin when connected to WAVE. Always check the Hanwha Vision support portal for the exact compatibility list and firmware notes.
How do I download and install the AI plugin?
Download the installer from the Hanwha Vision support portal and follow the PDF user manual for installation steps. Stop the Wisenet Wave server during installation if required, then activate the plugin and verify it appears in the WAVE client.
Can I enable AI on cameras that do not have on-camera analytics?
Yes. The core value of the AI analytics plugin is that it enables camera analytics for streams without built-in models. This allows you to add AI to legacy cameras without replacing hardware.
How do I reduce false positives in my deployments?
Tune polygon zones, sensitivity, and timers. Use excluded area settings and set minimum dwell times so the system ignores transient motion. Also, pair high-quality camera settings with proper lighting to lower noise.
Can I test the plugin before buying a license?
Yes. You can activate a trial license to evaluate functionality on a limited set of cameras. Use the trial to verify detection precision in your environment before scaling to production.
How does the plugin handle line crossing and direction detection?
The plugin supports virtual lines and multi-segment virtual lines. You can define a line and select the direction for which an event is triggered when an object crosses. Use virtual line during a predefined time windows to focus on specific intervals.
Can the system detect objects left behind?
Yes. The analytics can detect objects left behind and can generate alarms if an object stays in the defined area longer than a specified time. Configure the area to detect objects left and set the time threshold to match your policy.
How do events integrate with other systems?
Events can be streamed via webhooks, MQTT, or other integration points so you can feed them into SIEM, dashboards, or operational systems. This makes video events usable beyond security, for example in operations dashboards.
What are recommended camera settings to optimise AI?
Use stable exposure and sharp focus, choose sufficient resolution for the object size you need to detect, and avoid aggressive compression that hides detail. Adjust frame rate to balance motion clarity with bandwidth, and keep the field-of-view consistent.
How do I manage performance and capacity?
Monitor CPU, GPU and network load on the Wisenet Wave server and scale resources as your camera count grows. Test peak loads, and plan hardware upgrades when the performance of the system might be impacted by additional streams or higher retention requirements.